Gates are customizable entry points that require users to take a certain action before accessing your page or live channel.
There are four main types of gates:
1. Login: Users must log in or create an account to access
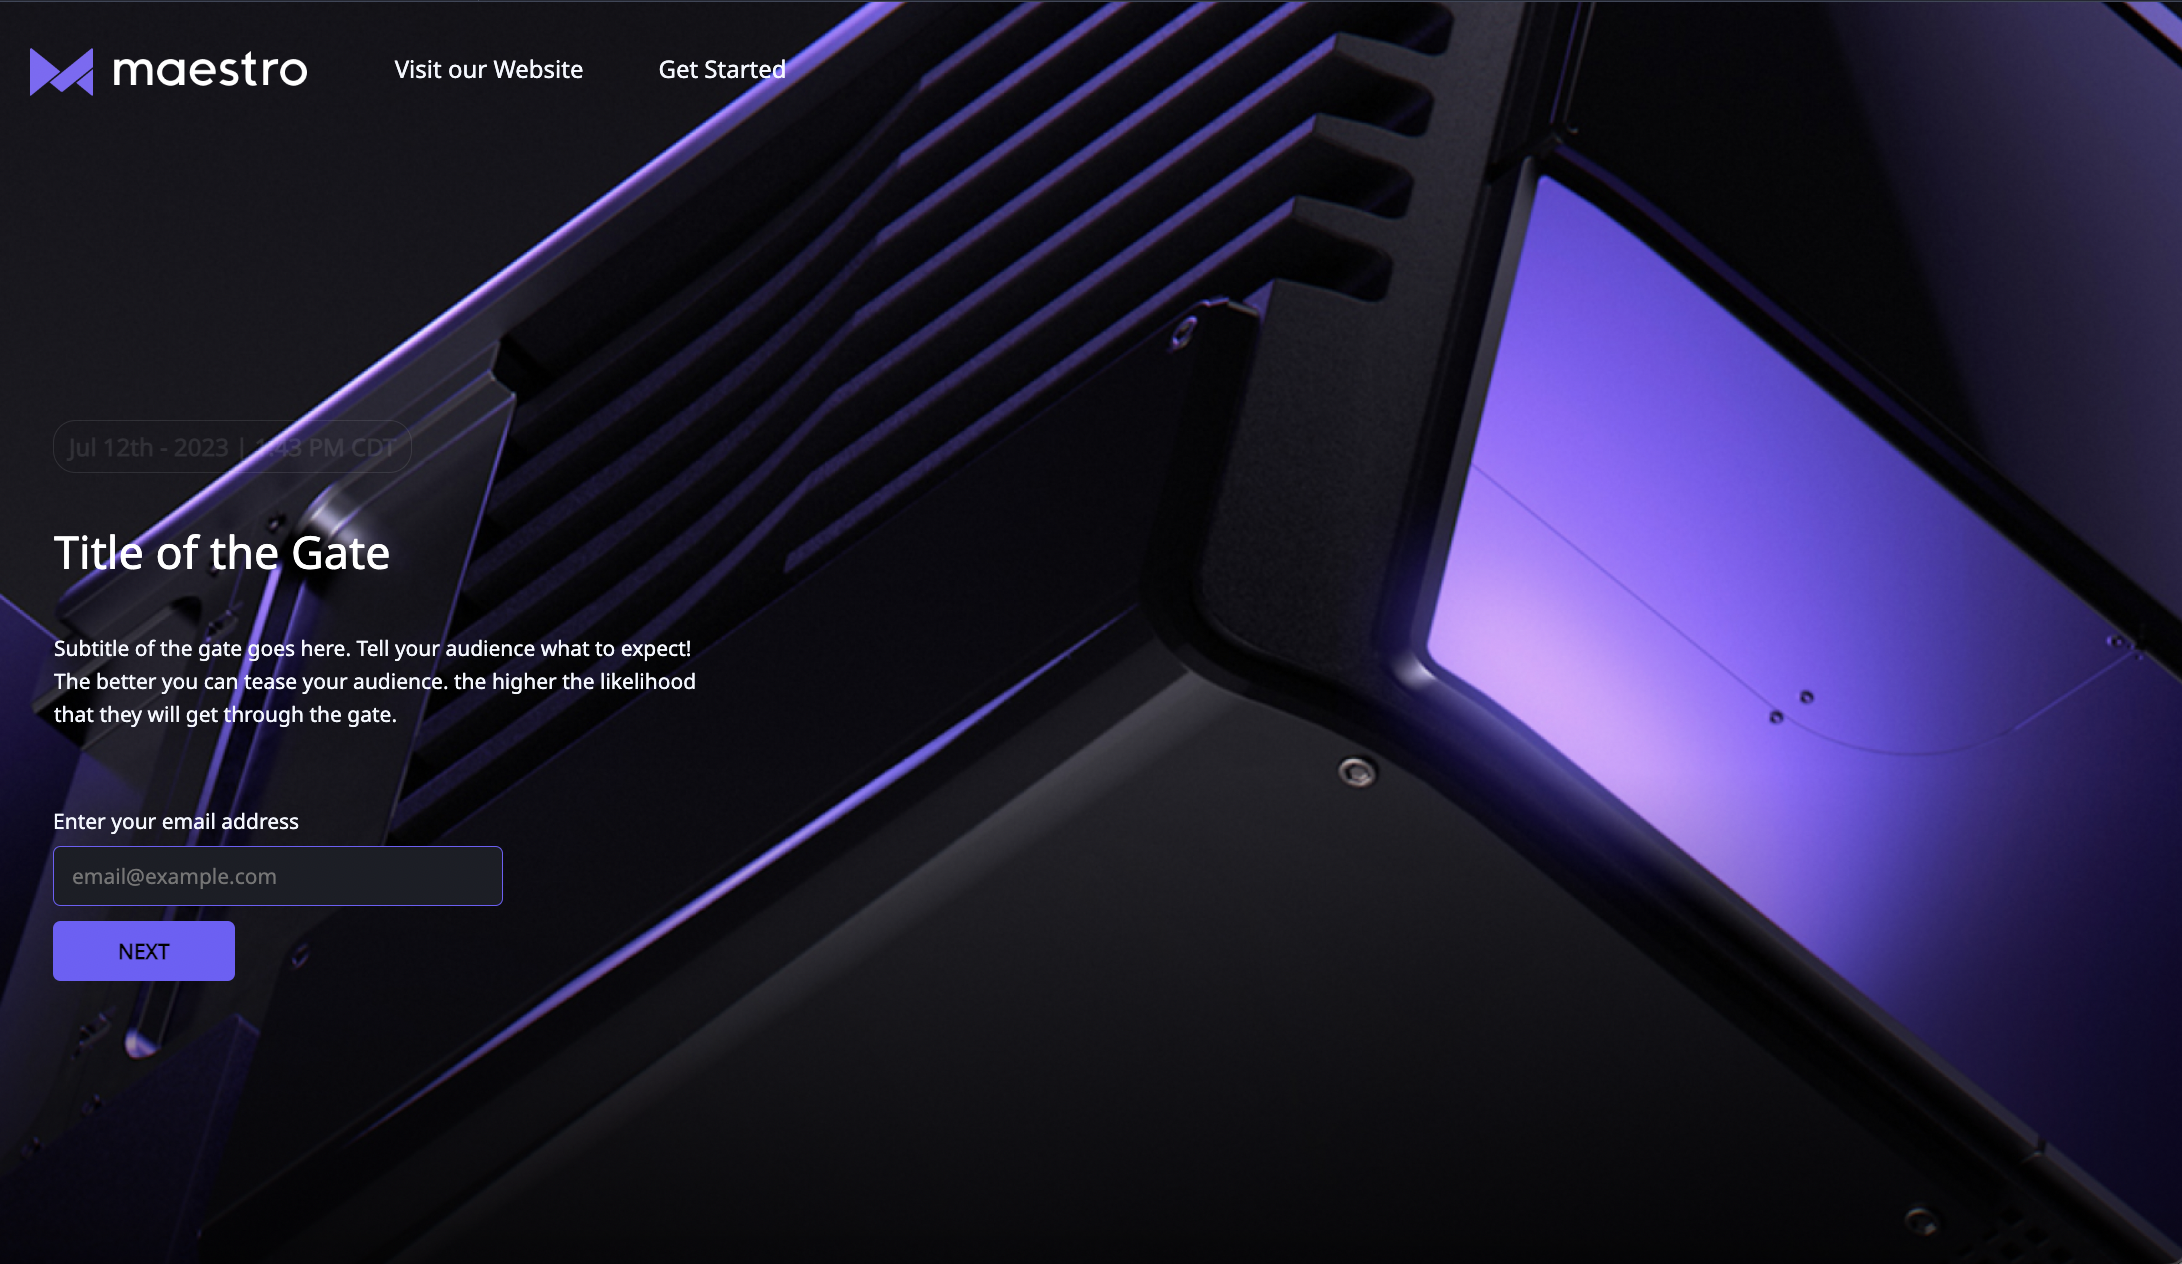
Example of a Login Gate
2. Password: Users require a password to access
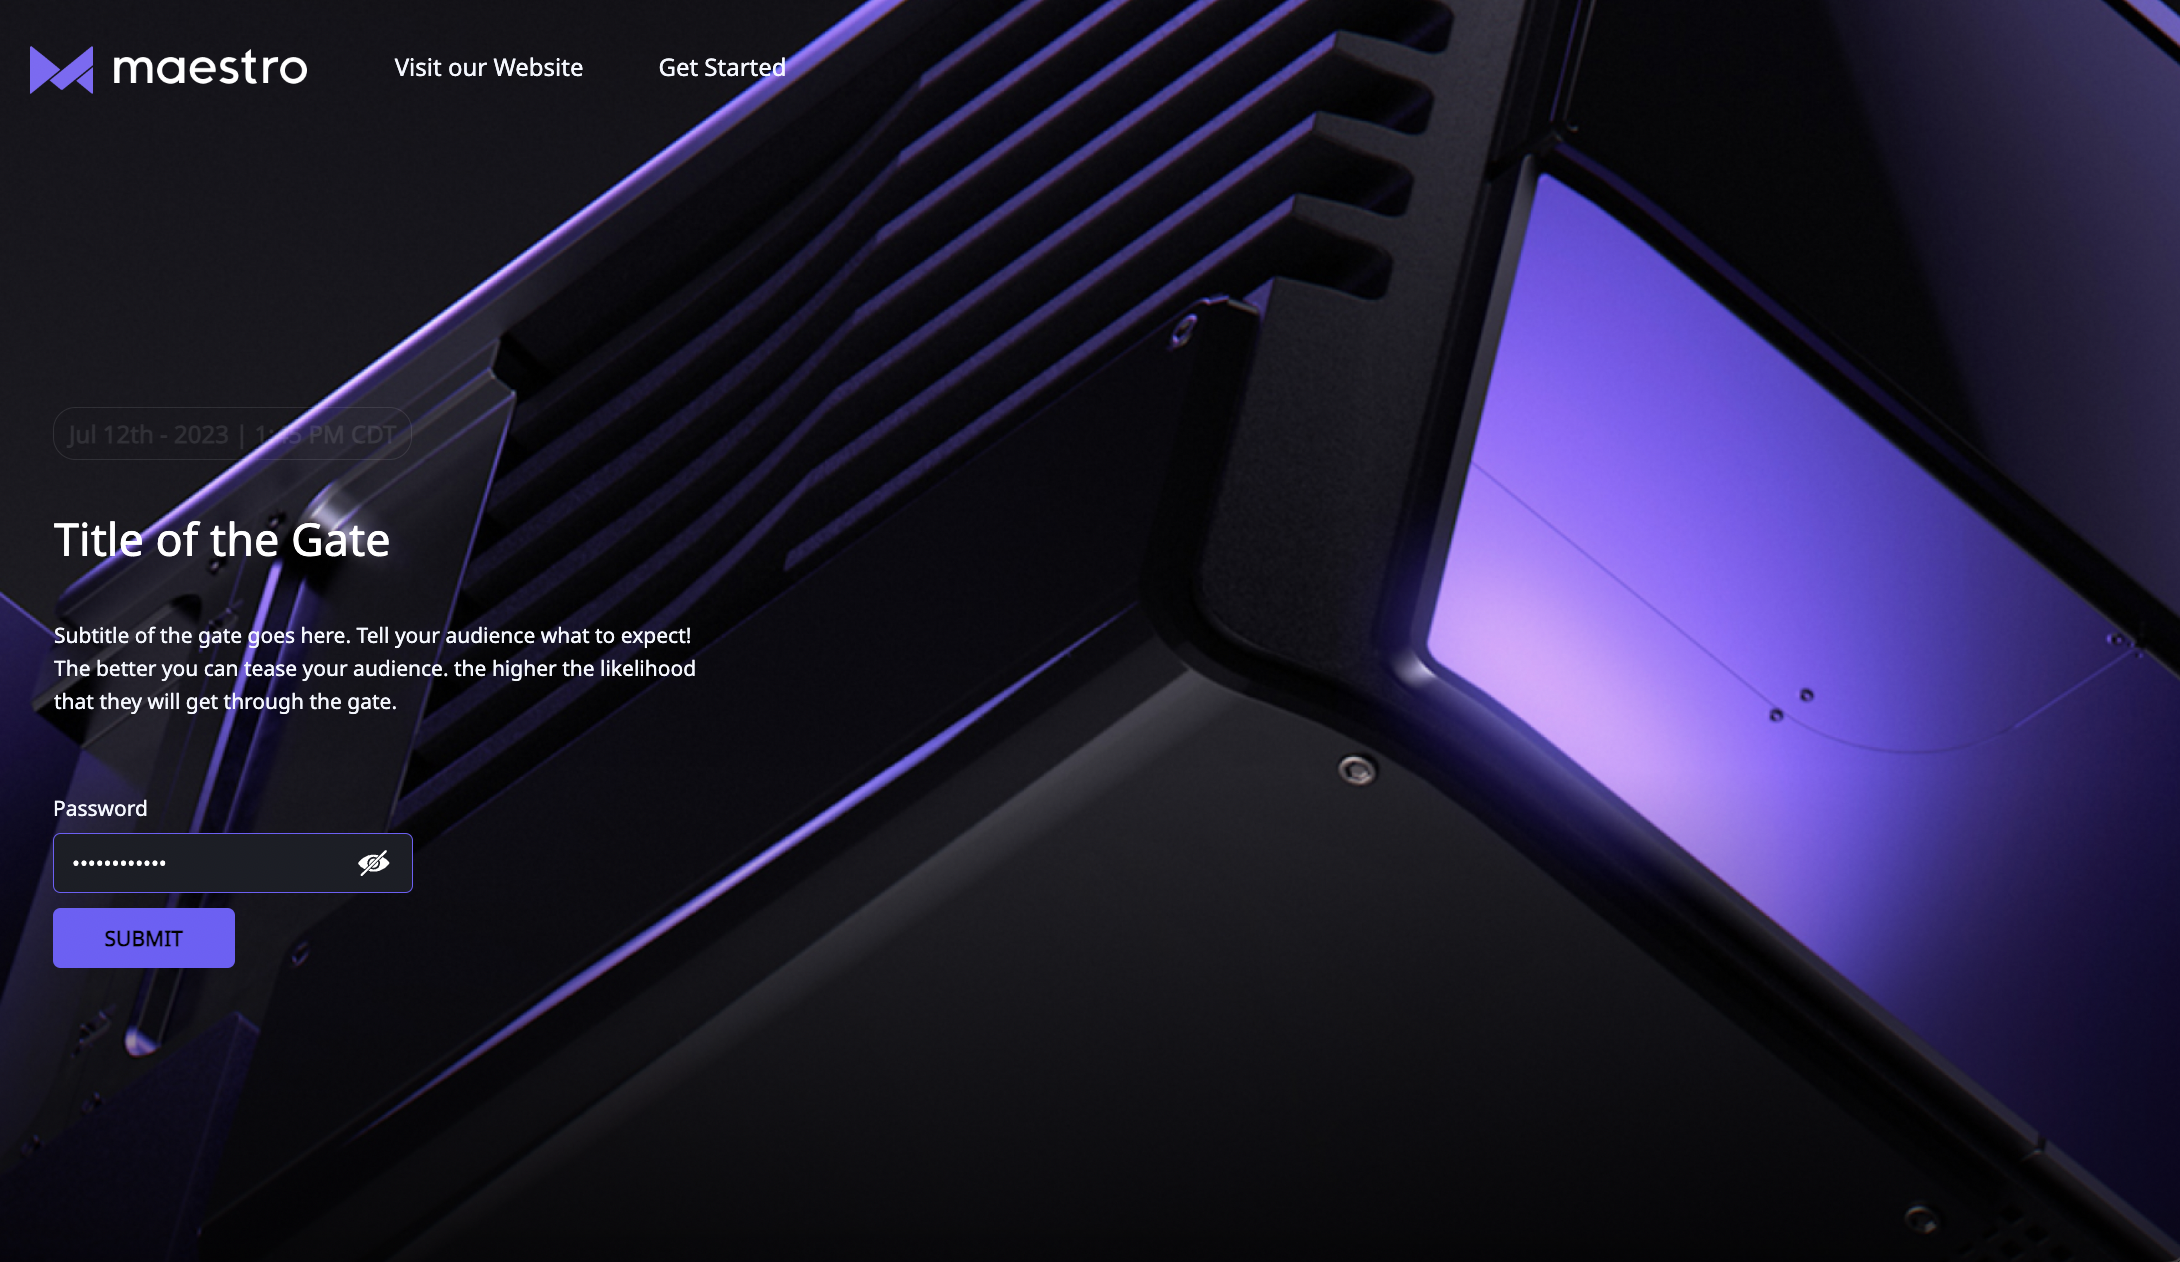
Example of a Password Gate
3. Tickets, Bundles, & Subscriptions: Users require payment to access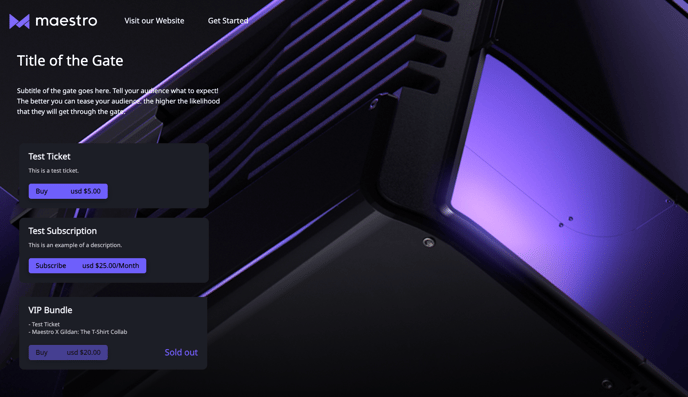
Example of a Gate with a Ticket, Subscription, and Bundle for sale.
4. Access Code: Users must enter an access code to access
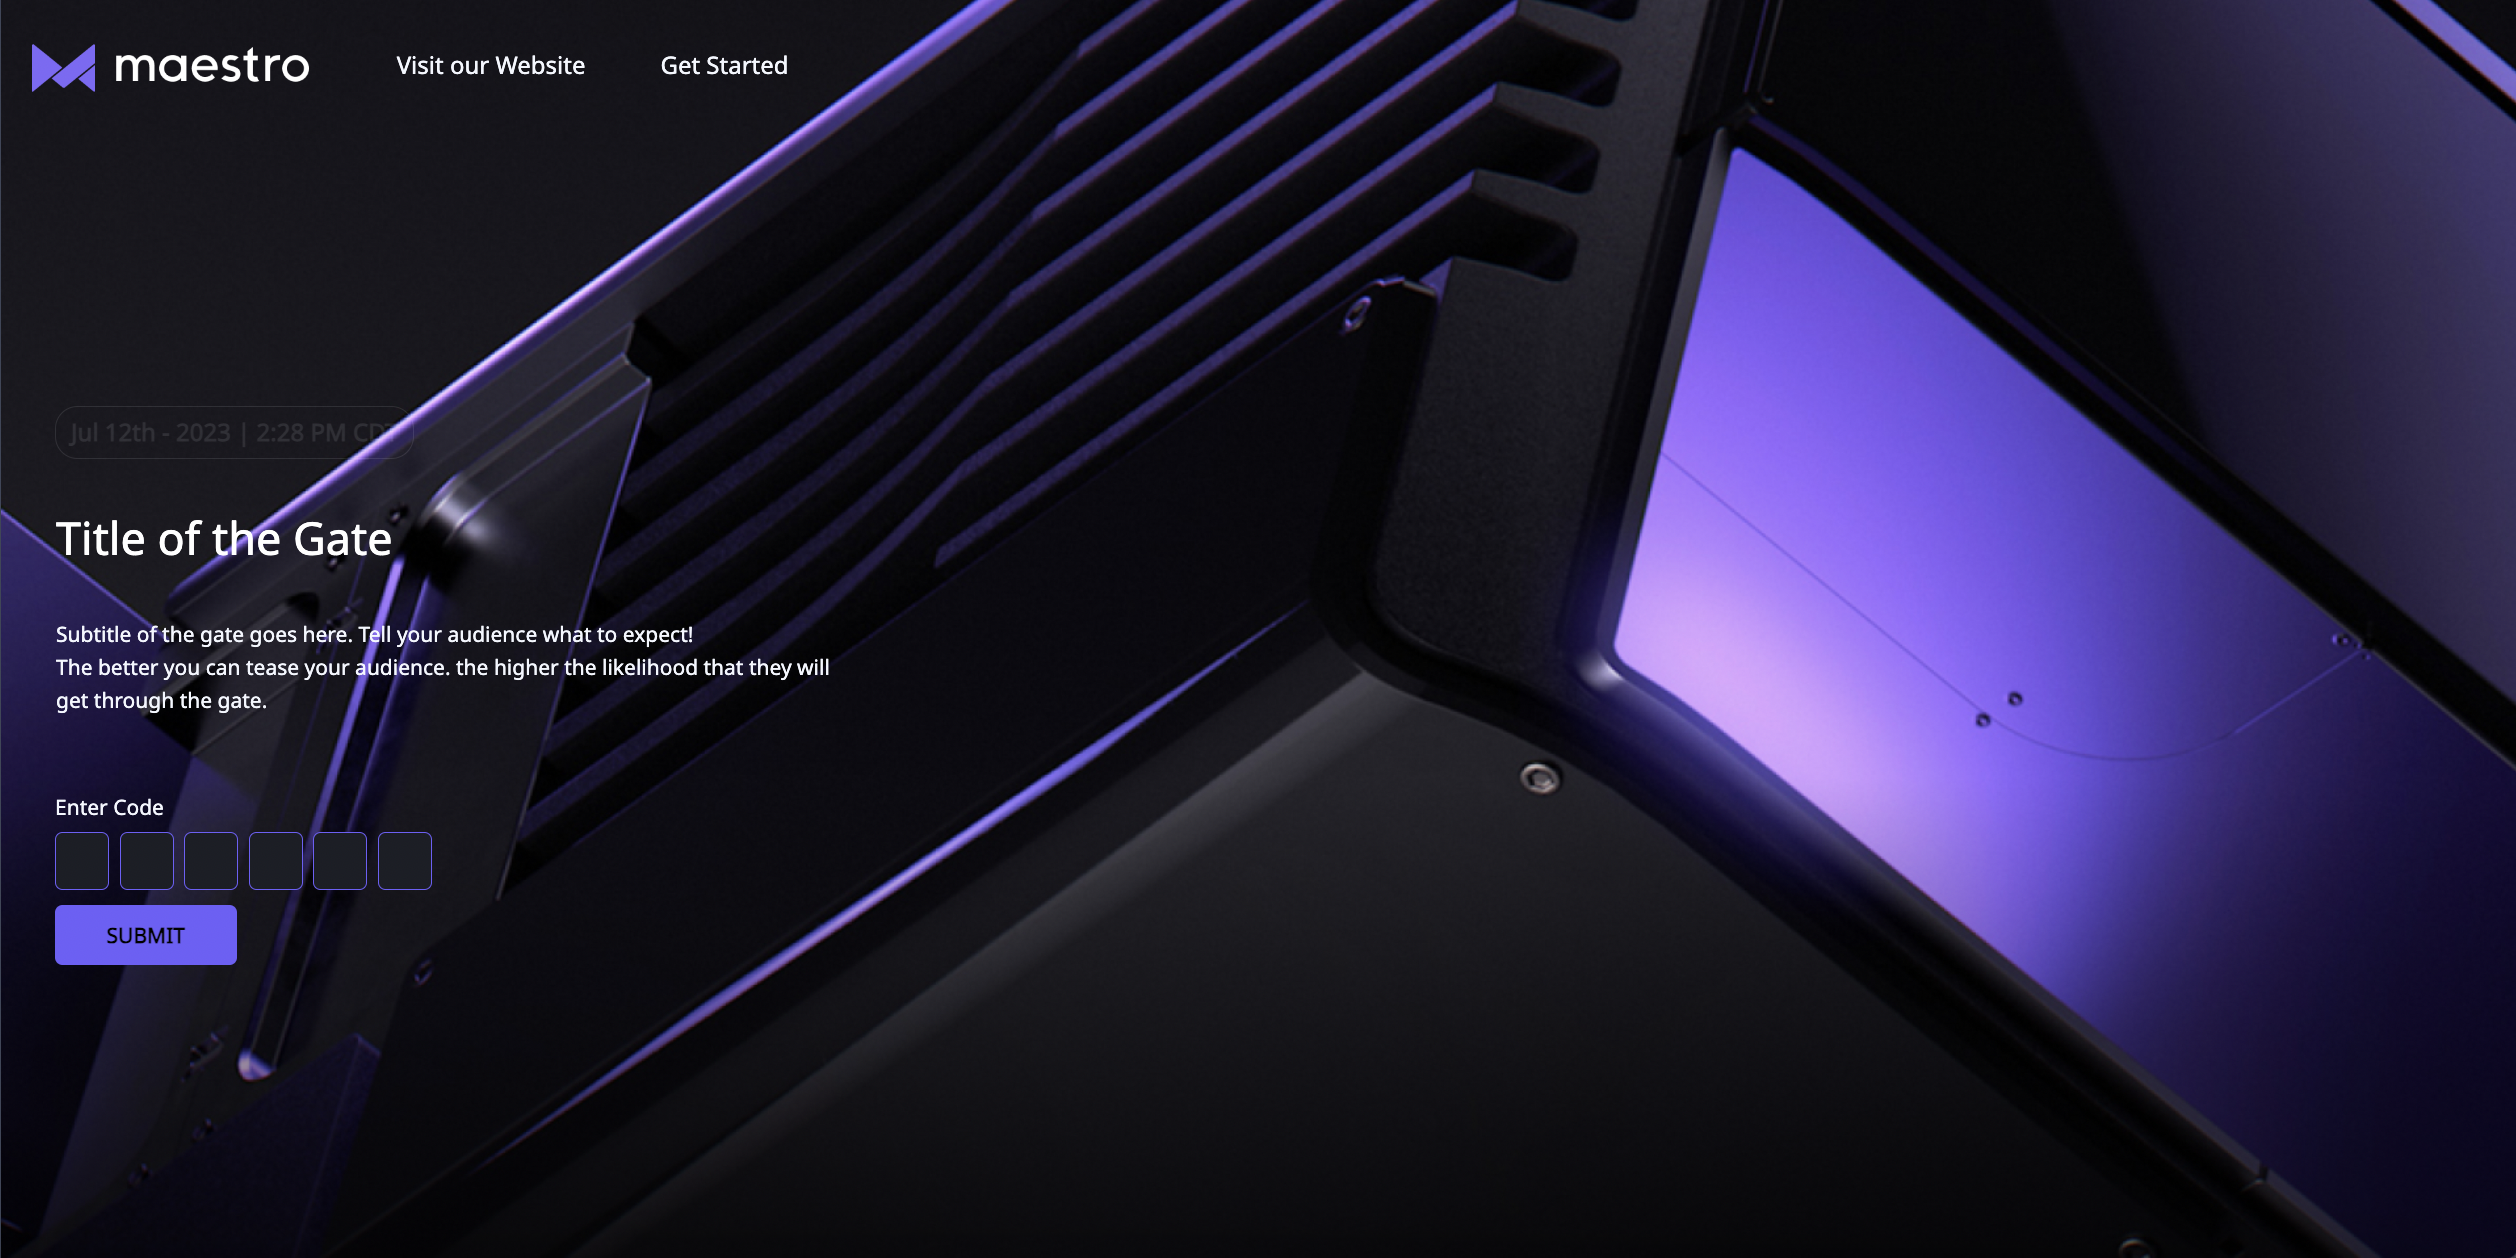
Example of a Gate using Access Codes Only.
Please note: Access Codes are a premium feature. Please reach out to your Customer Success Manager for more information. If your plan type does not include a CSM, please submit a ticket here.
Each type of gate can be customized with a title, subtitle, as well as mobile and desktop background images.
How to Add a Gate
- Using the navigation dropdown, ensure you're on the live channel or page where you'd like to add a gate
- While on the selected channel, click "Access" in the admin sidebar
- The site will change states, and show you a preview of the gate
- Click
 in the top right-hand corner to edit, and the editor will appear
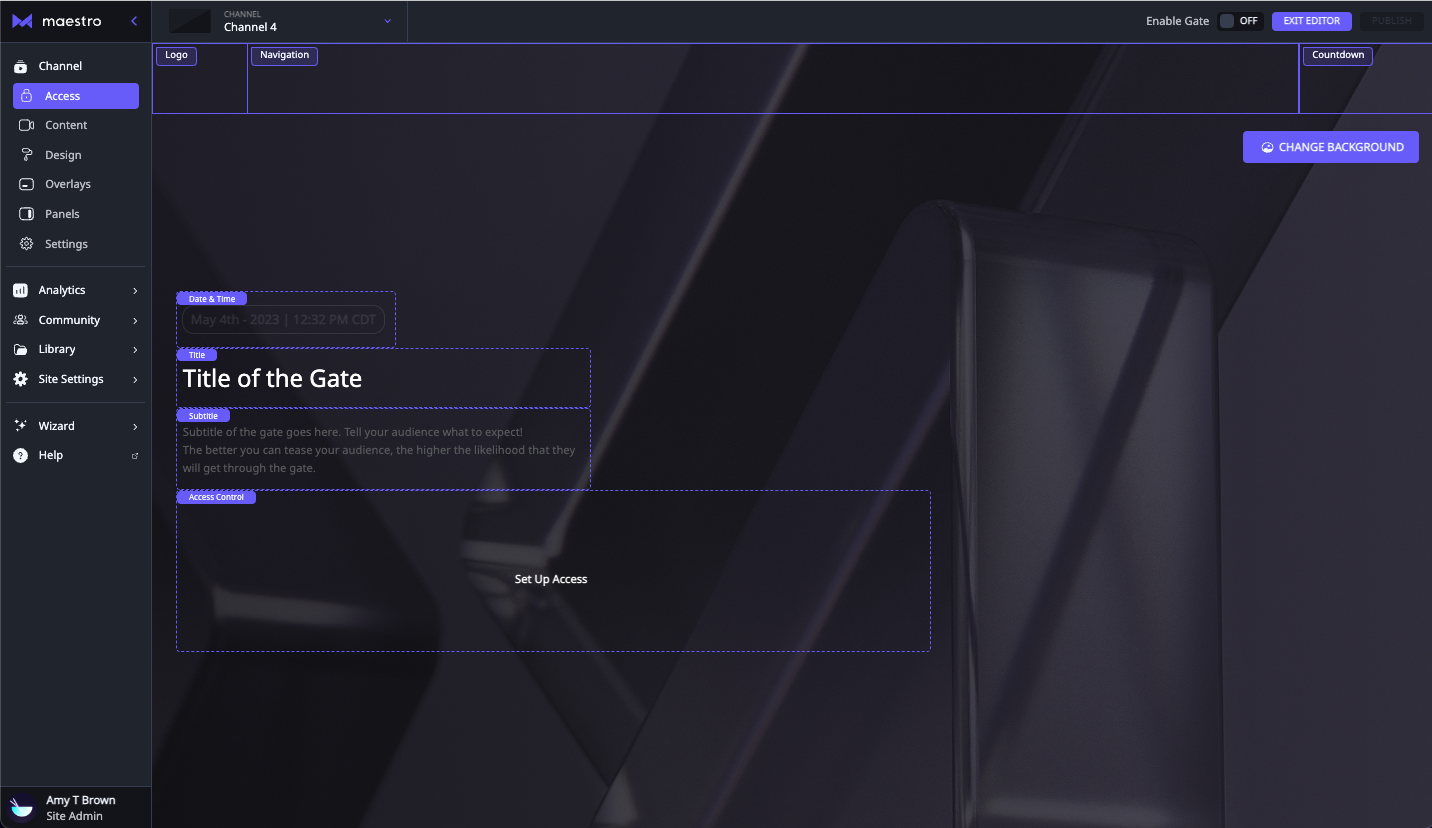
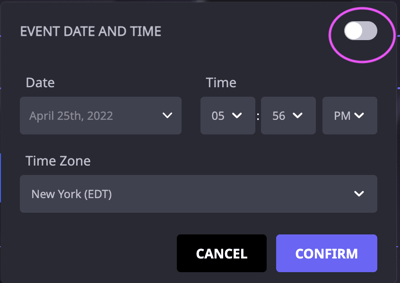
- Optional: Add the date and time of the event (Note: To turn on the Event date and time, toggle the option "on")
- Enter a title (Note: Typically, this is the name of the event)
- Optional: Add a subtitle to tell your audience what to expect from your event. (Note: The better you can entice your audience, the more likely they will get through the gate; this text field has a 299-character limit)
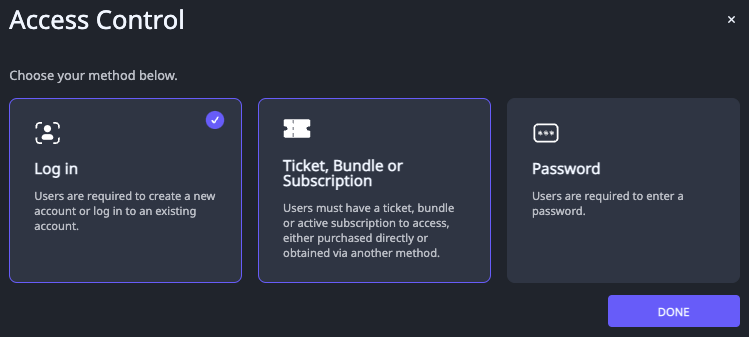
- Click the "Access Control" area to select your gate type
- Select the method of access control you would like to use
- To add an access code gate, click "Ticket" or "Subscription" > "Show Advanced Options" > "Access Codes Only (Advanced)" and toggle the option "On"
To learn more about Access Codes, please click here.

-
- Desktop Background: 1920x1080
- Mobile Background: 1100x1440
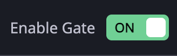
13. Finally, to turn on your gate, use the "Enable Gate" toggle at the top right of the page or live channel where you set it up
Note: To preview the gate, simply view the gated channel in a logged-out state. One easy way to do this is by opening the channel in a private/incognito browsing window.
Note: You cannot put a gate in front of YouTube or Twitch Content.
Have any more questions? Join our Discord server for more helpful tips and tricks.