The iframe panel is a great way to integrate a third-party or custom panel with no custom development.
From the Channel you'd like to add an iframe panel on, click the ![]() button to open the editor. Click the
button to open the editor. Click the ![]() icon in the side bar segment to select and configure your panel.
icon in the side bar segment to select and configure your panel.
Scroll down until you find the Iframe Panel, and toggle it on.

Then, use the Gear icon to configure it.
The iframe panel has two sections:
- URL: Simply input the URL of the link you wish to iframe (Note: You must add a name to the Panel in order to save it)
- iframe tag: Input the URL, along with the custom iframe tags, which typically start with <iframe>...
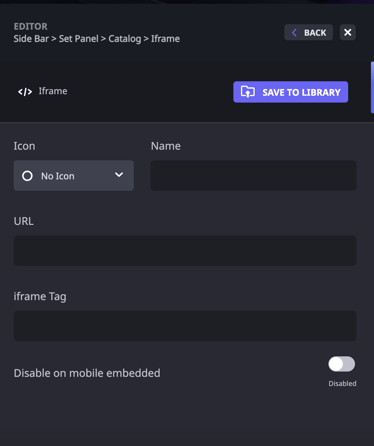
From here, assign an icon, name, URL, and iframe tag. You can also disable this content on mobile embedded systems by toggling it on.
Note: Not all sites allow embeds on third party websites. If you add a link and get a grey sad face: ![]() this is likely the issue.
this is likely the issue.
The way to resolve this is to reach out to the parent URL (i.e the link you are trying to embed) and see if they can whitelist your live domain to allow the embed to display.
Maestro does not have control over whether an iframe URL displays or how it operates within the panel.
To add your panel to your site, follow the steps in our dedicated guide HERE.