
If you need to use a Virtual Audio Source with Maestro Studio, it is possible! For users with a Mac, we recommend Loopback. For users with a PC, we recommend VB Audio Cable.
Loopback Instructions:
In order to easily configure a Virtual Audio device for Maestro Studio, we recommend using Loopback by Rogue Amoeba.* Using Loopback, you can create “virtual audio devices”, which appear on your system exactly like a physical device; just like Virtual Cameras on OBS. These virtual devices merge sound from multiple applications and inputs into a single source, which you can then output to any audio application or destination.
*Please note, Loopback is a 3rd party application, and does require a $99 License Key. You can download a free trial of Loopback in order to test and determine if the application is right for you.
To use Loopback, download and run the application. When you open it, click "+ New Virtual Device" at the bottom left corner of the Loopback Application to get started.
With a Virtual Device added, the next step is to give it a label.
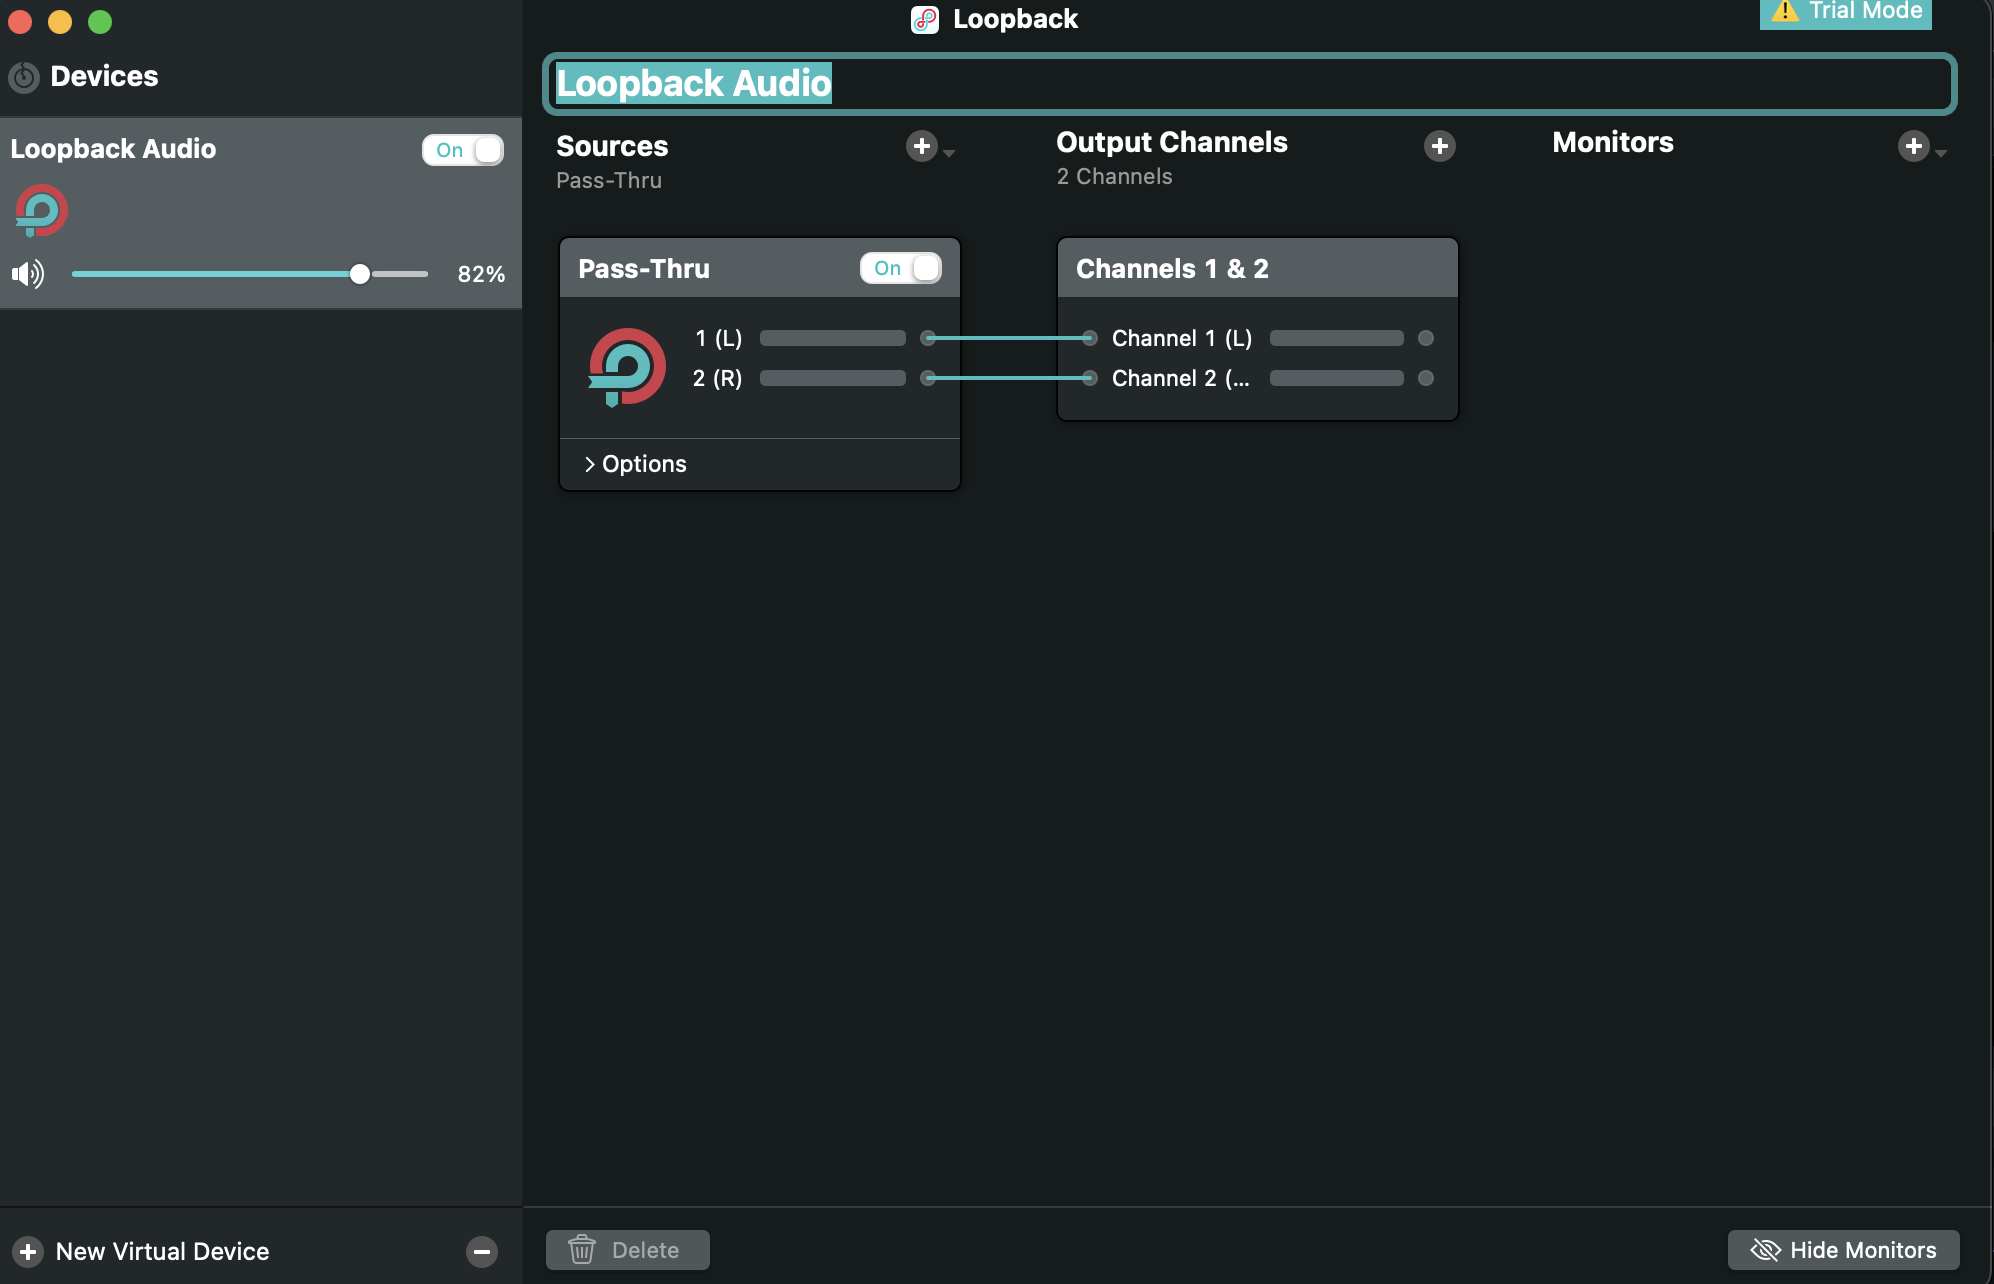
Then, under the “Sources” section, click the + icon.

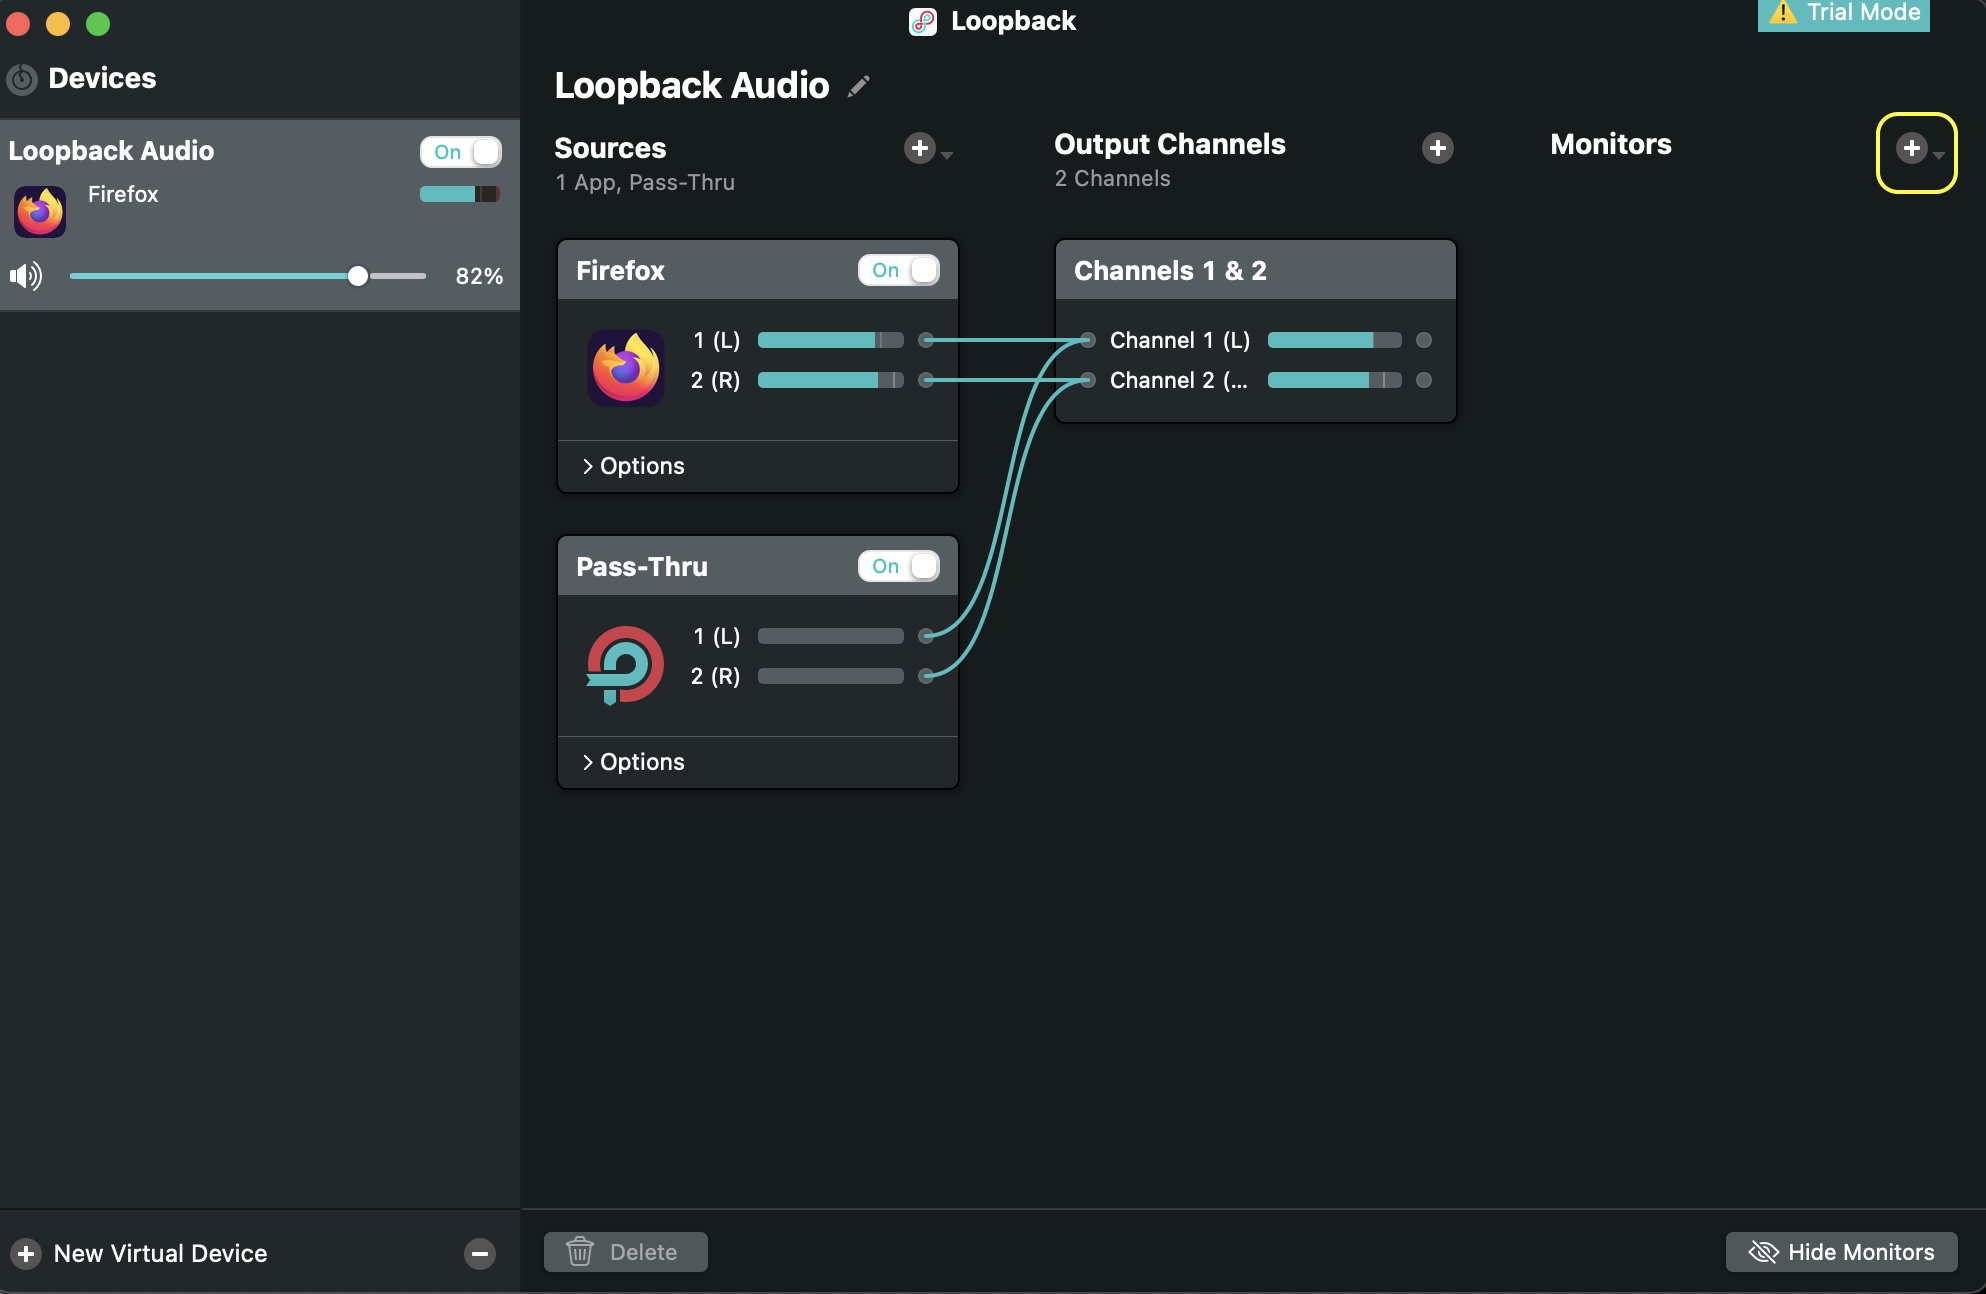
In this example, we are selecting Firefox as our source application, as we are passing through audio from a YouTube video in the Firefox Browser. Select the Source playing the audio that you would like to pass through to Maestro Studio.
You will notice at this point the audio source will appear to have stopped playing. This is expected, as it is being routed to Loopback. In order to hear it, you’ll need to add a monitoring device. We’ll do that in a moment.
Open Maestro Studio in a Google Chrome browser window. When the Audio/Video settings modal opens, you’ll need to select Loopback Audio (Virtual) as your microphone source.

Click “SAVE”.
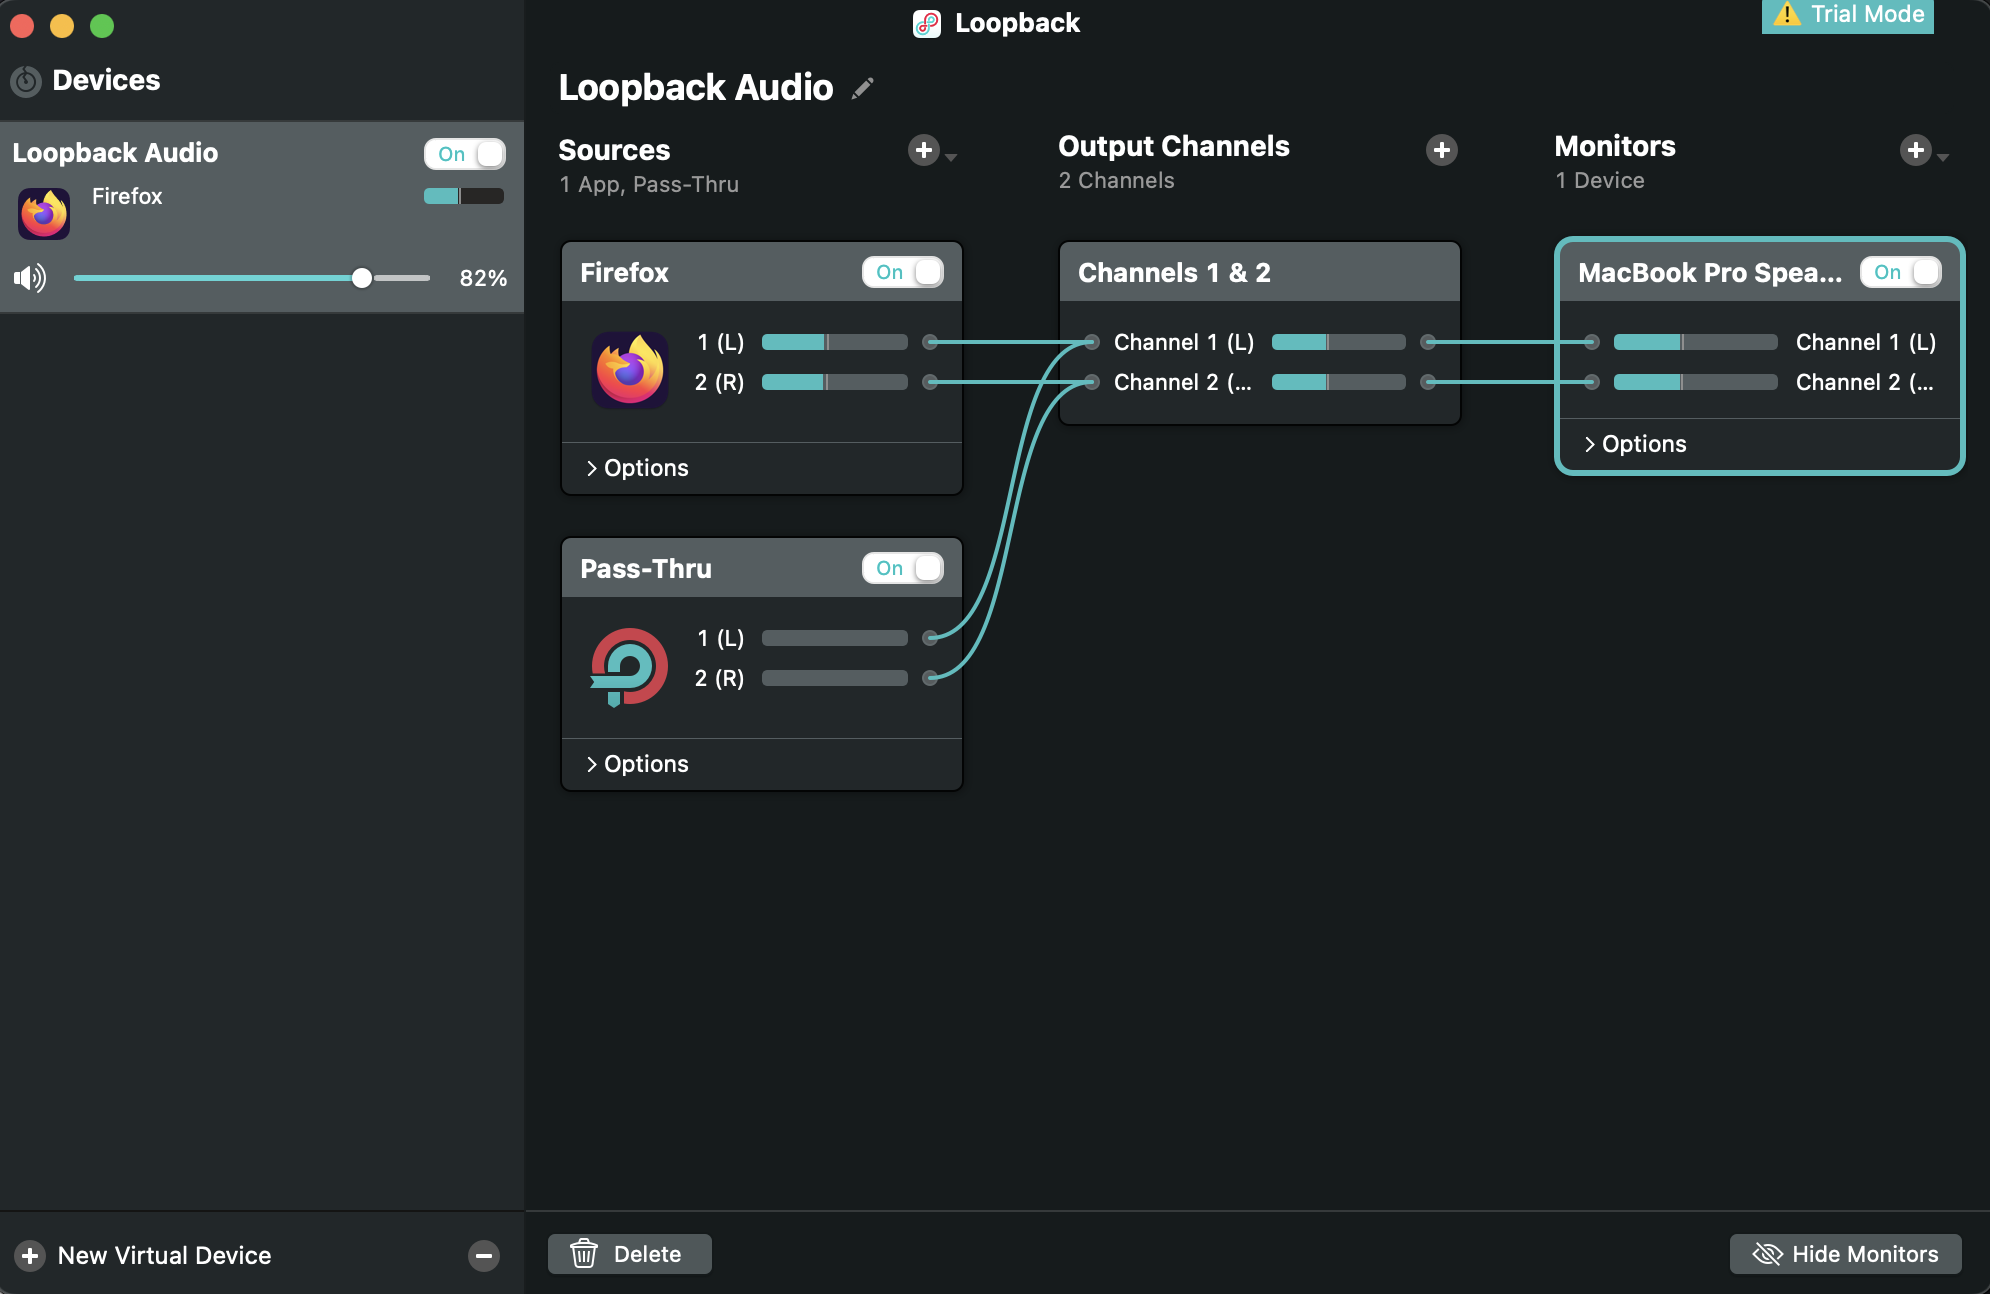
Now, let’s set up a monitor in loopback so you can hear playback. Open Loopback. In the “Monitors” section, click the + icon.
Select the playback device where you’d like to hear your monitor.

If you’d like to change the volume of your Audio Monitor, click the dropdown labeled “Options” on the monitor source to adjust the levels. After your initial test and configuration, it is strongly suggested to drop the level of the monitor to an almost perceptible level to reduce confusion.
Loopback displays the Audio Route for you. So, in the example below, you can see that we are playing Audio from Firefox, sending it through Loopback’s Pass-Thru to Output Channels 1&2 (the Loopback Virtual Device), then back to the Mac’s speakers as a monitoring device.
Back in Maestro Studio Studio, click “GO LIVE”. We strongly suggest opening a new browser tab of your Maestro Live Channel to check the configuration, that all sources are coming through properly, and that your volume levels sound good.
Congratulations! You are now live and passing through audio with a virtual audio device!
Please note, you can also use a Virtual Camera Source. To use a Virtual Camera Source with Maestro Studio, please follow the directions provided in our dedicated guide.