If you'd prefer to watch a Product Demo, please check out our Introduction to Maestro Page which includes a demonstration by our CEO and Founder, Ari Evans!
Our Introduction to Maestro site also contains the quick video series Maestro in a Minute which focuses on key product features and frequently asked questions.
Quick Guide
1. Log into Your Site
First things first! It's time to log into your site. There are two ways to log in.
The first option is to click the "Log In" button on maestro.io. Follow the login flow. If you are a member of multiple sites on Maestro, you'll need to choose your site from a list. 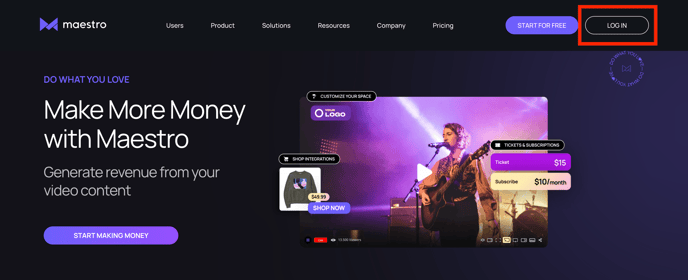
The other option is to navigate to your site by going to maestro.tv/[yoursitename] in a browser window (we recommend Chrome). Click the “Log In” button on the top right corner of that page, and enter your account credentials.
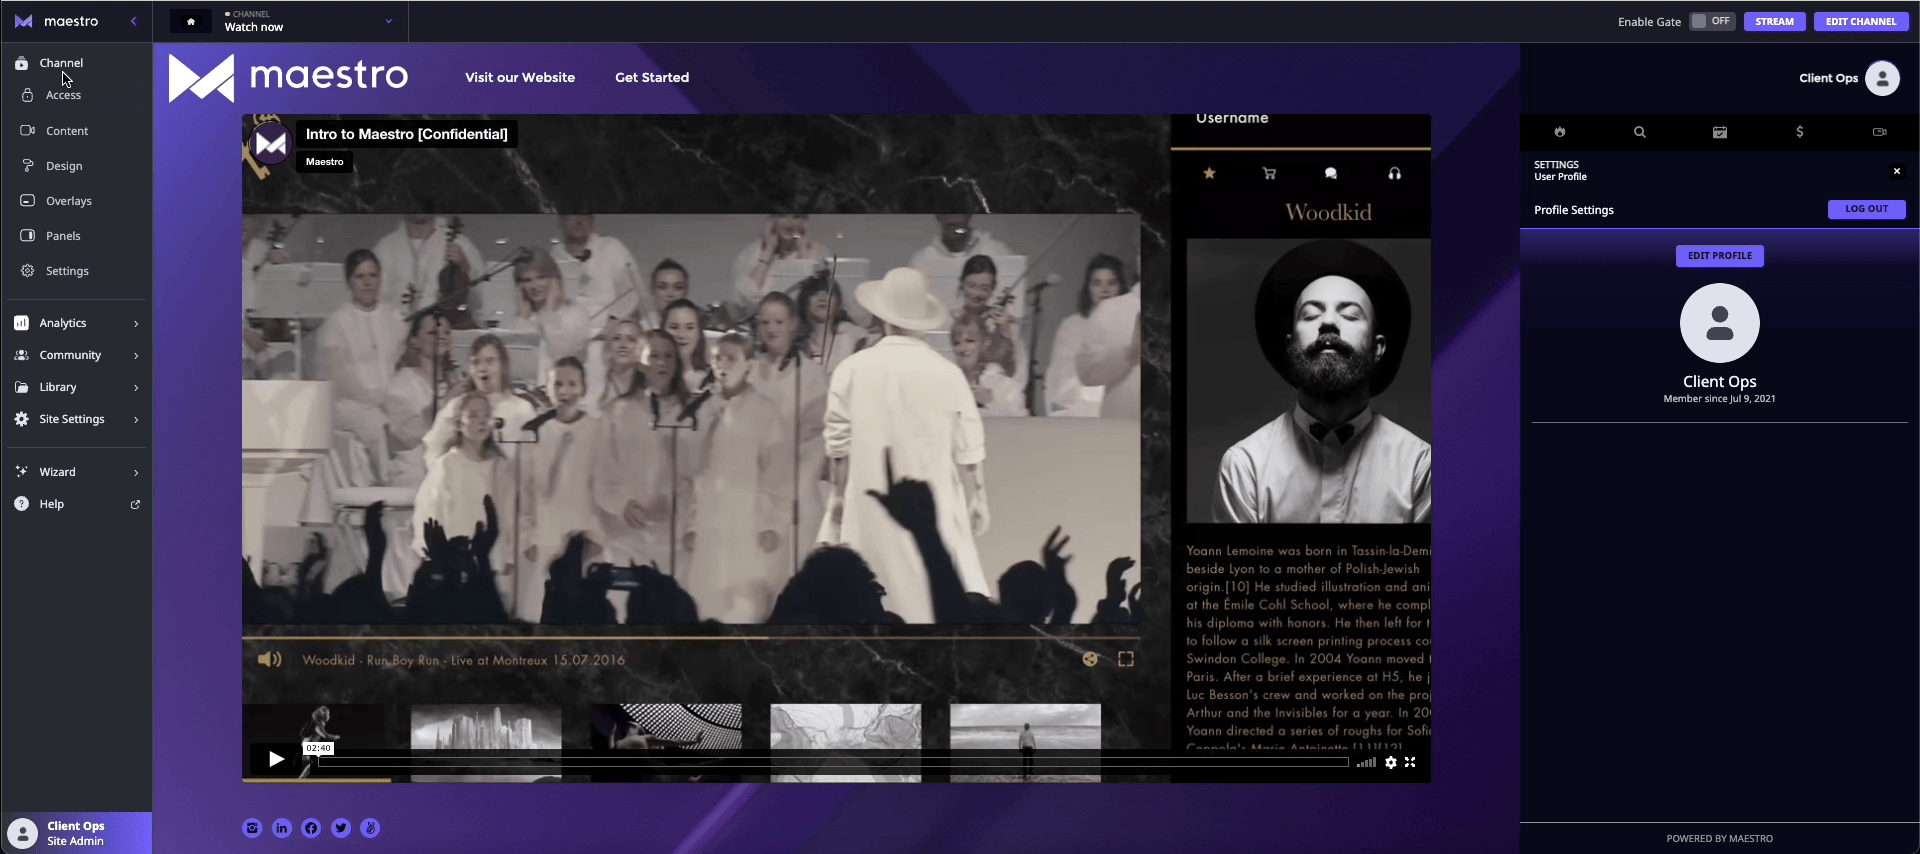
Once you’re in, you’ll be taken straight to your Home Page. This is what your viewers will see if they come to your Maestro-powered site.
2. Choose a Theme
On the left side of your screen is your Admin bar. In the Admin bar, click the “Design” tab to open a modal for design settings.
Maestro offers a collection of predesigned themes with cohesive color palettes. Themes can be configured on each of your pages individually, which means each page can have its own look and feel if you choose!
Take a moment to look through the themes available.
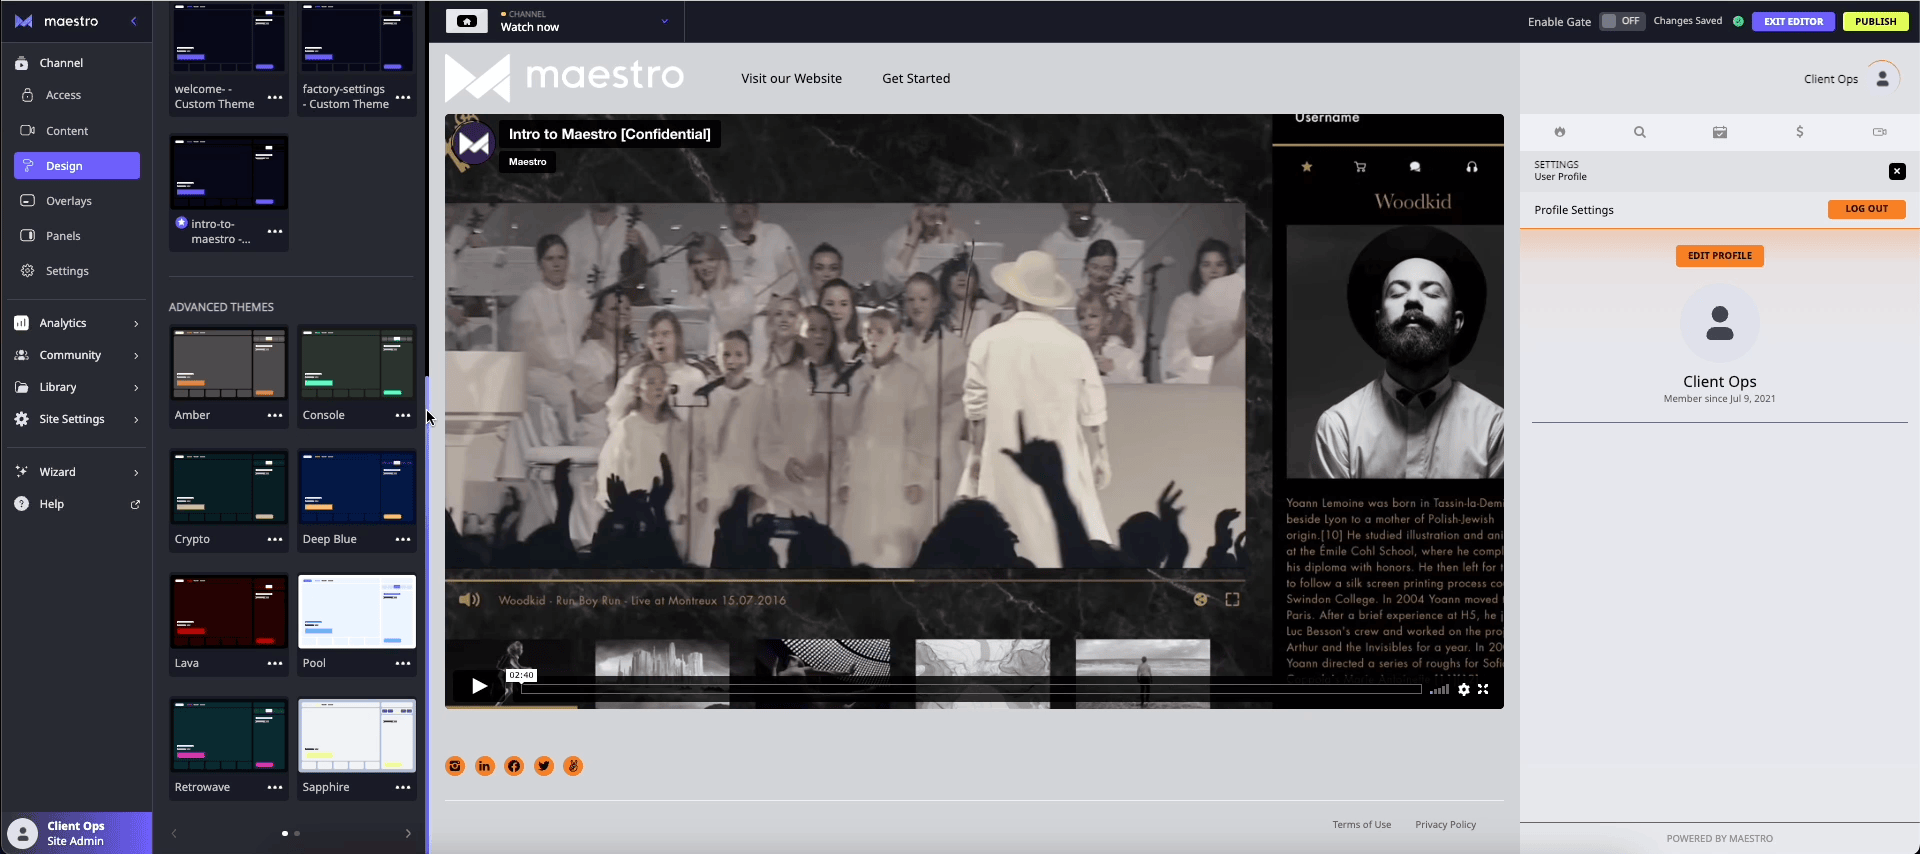
If you’d like to customize your theme even further, click the three dots on any theme to customize its components. You can also change the fonts and upload your own background for a totally branded experience.
Read more about Themes and Design.
3. Customize Your Page
With Maestro’s pages, you can use buildable blocks to create a gorgeous video website that highlights your brand. The purpose of these pages is to organize your content and make everything easily accessible to your audience all in one place.

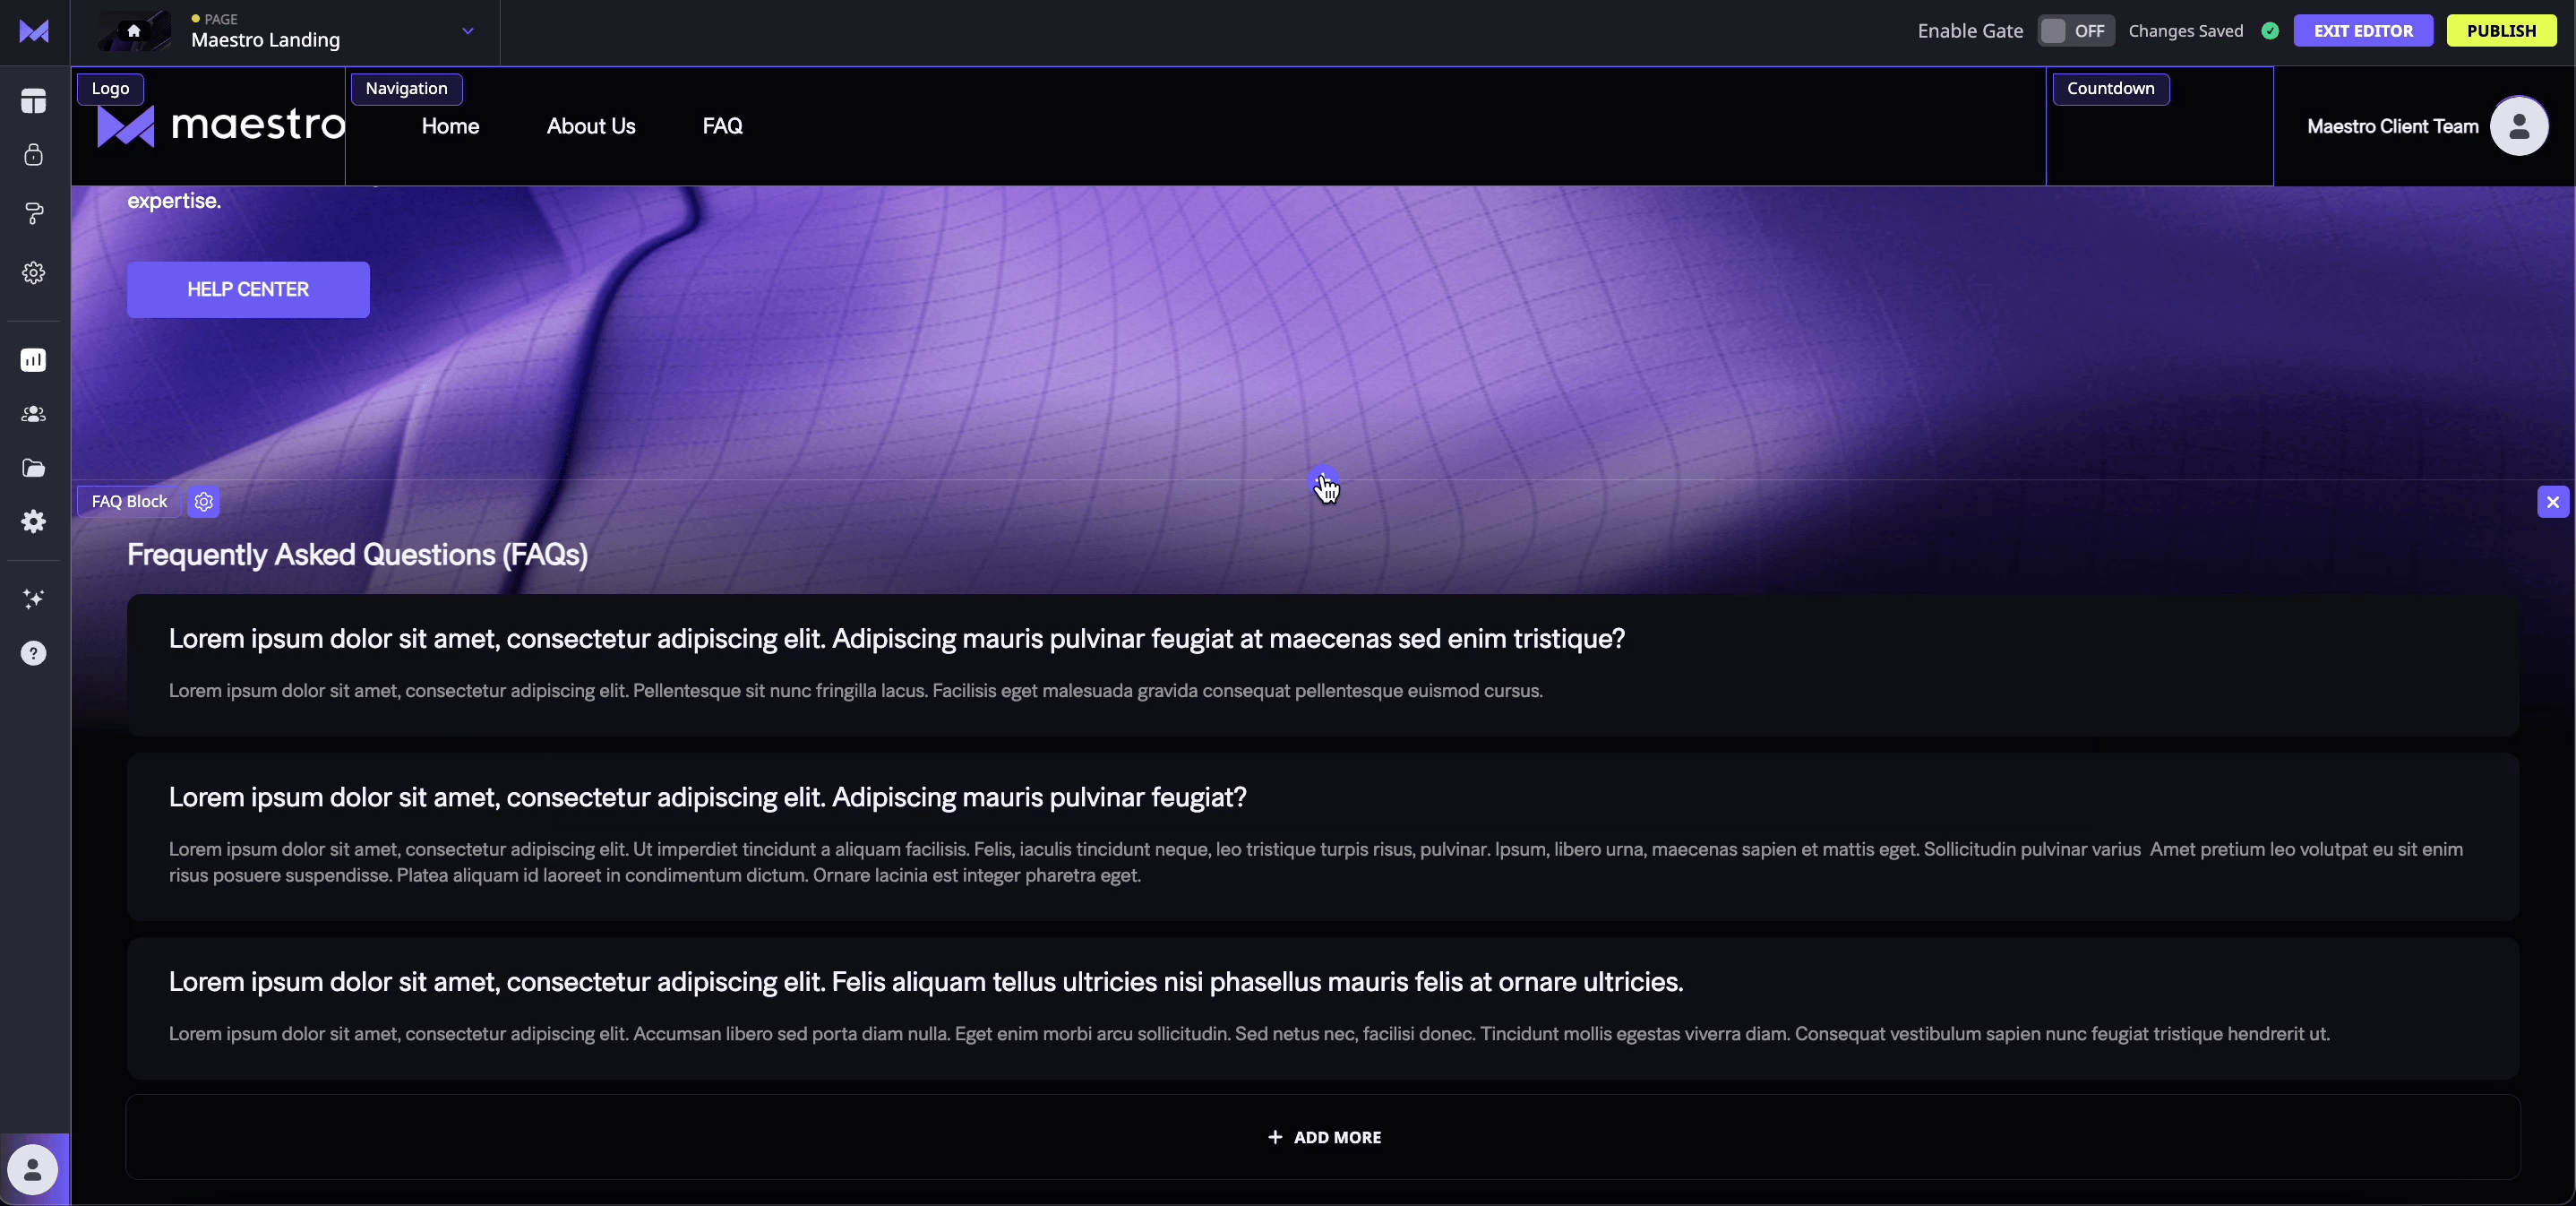
Some of the elements that you can add to your pages include a large hero banner, spotlighted video, text banner, FAQ, and image gallery blocks.
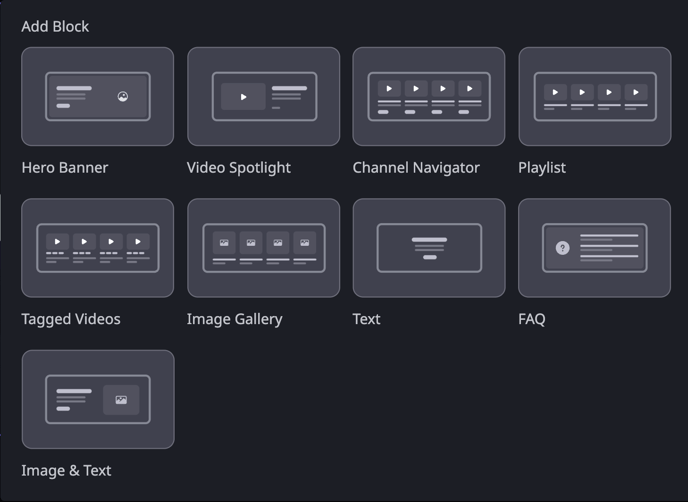
To add a block, click “Editor,” then hover over the "Content" section and click “Edit.” You’ll be prompted to choose a block type. Once you add the block, you can customize it by clicking the different fields or using the gear icon for more options.
To move it, simply click the block and drag it to where you want it to go.
Learn more about pages and the page builder.
4. Customize Your Live Channel
On Maestro, a live channel is for hosting live stream experiences and engaging with your audience.
Edit Your Live Channel
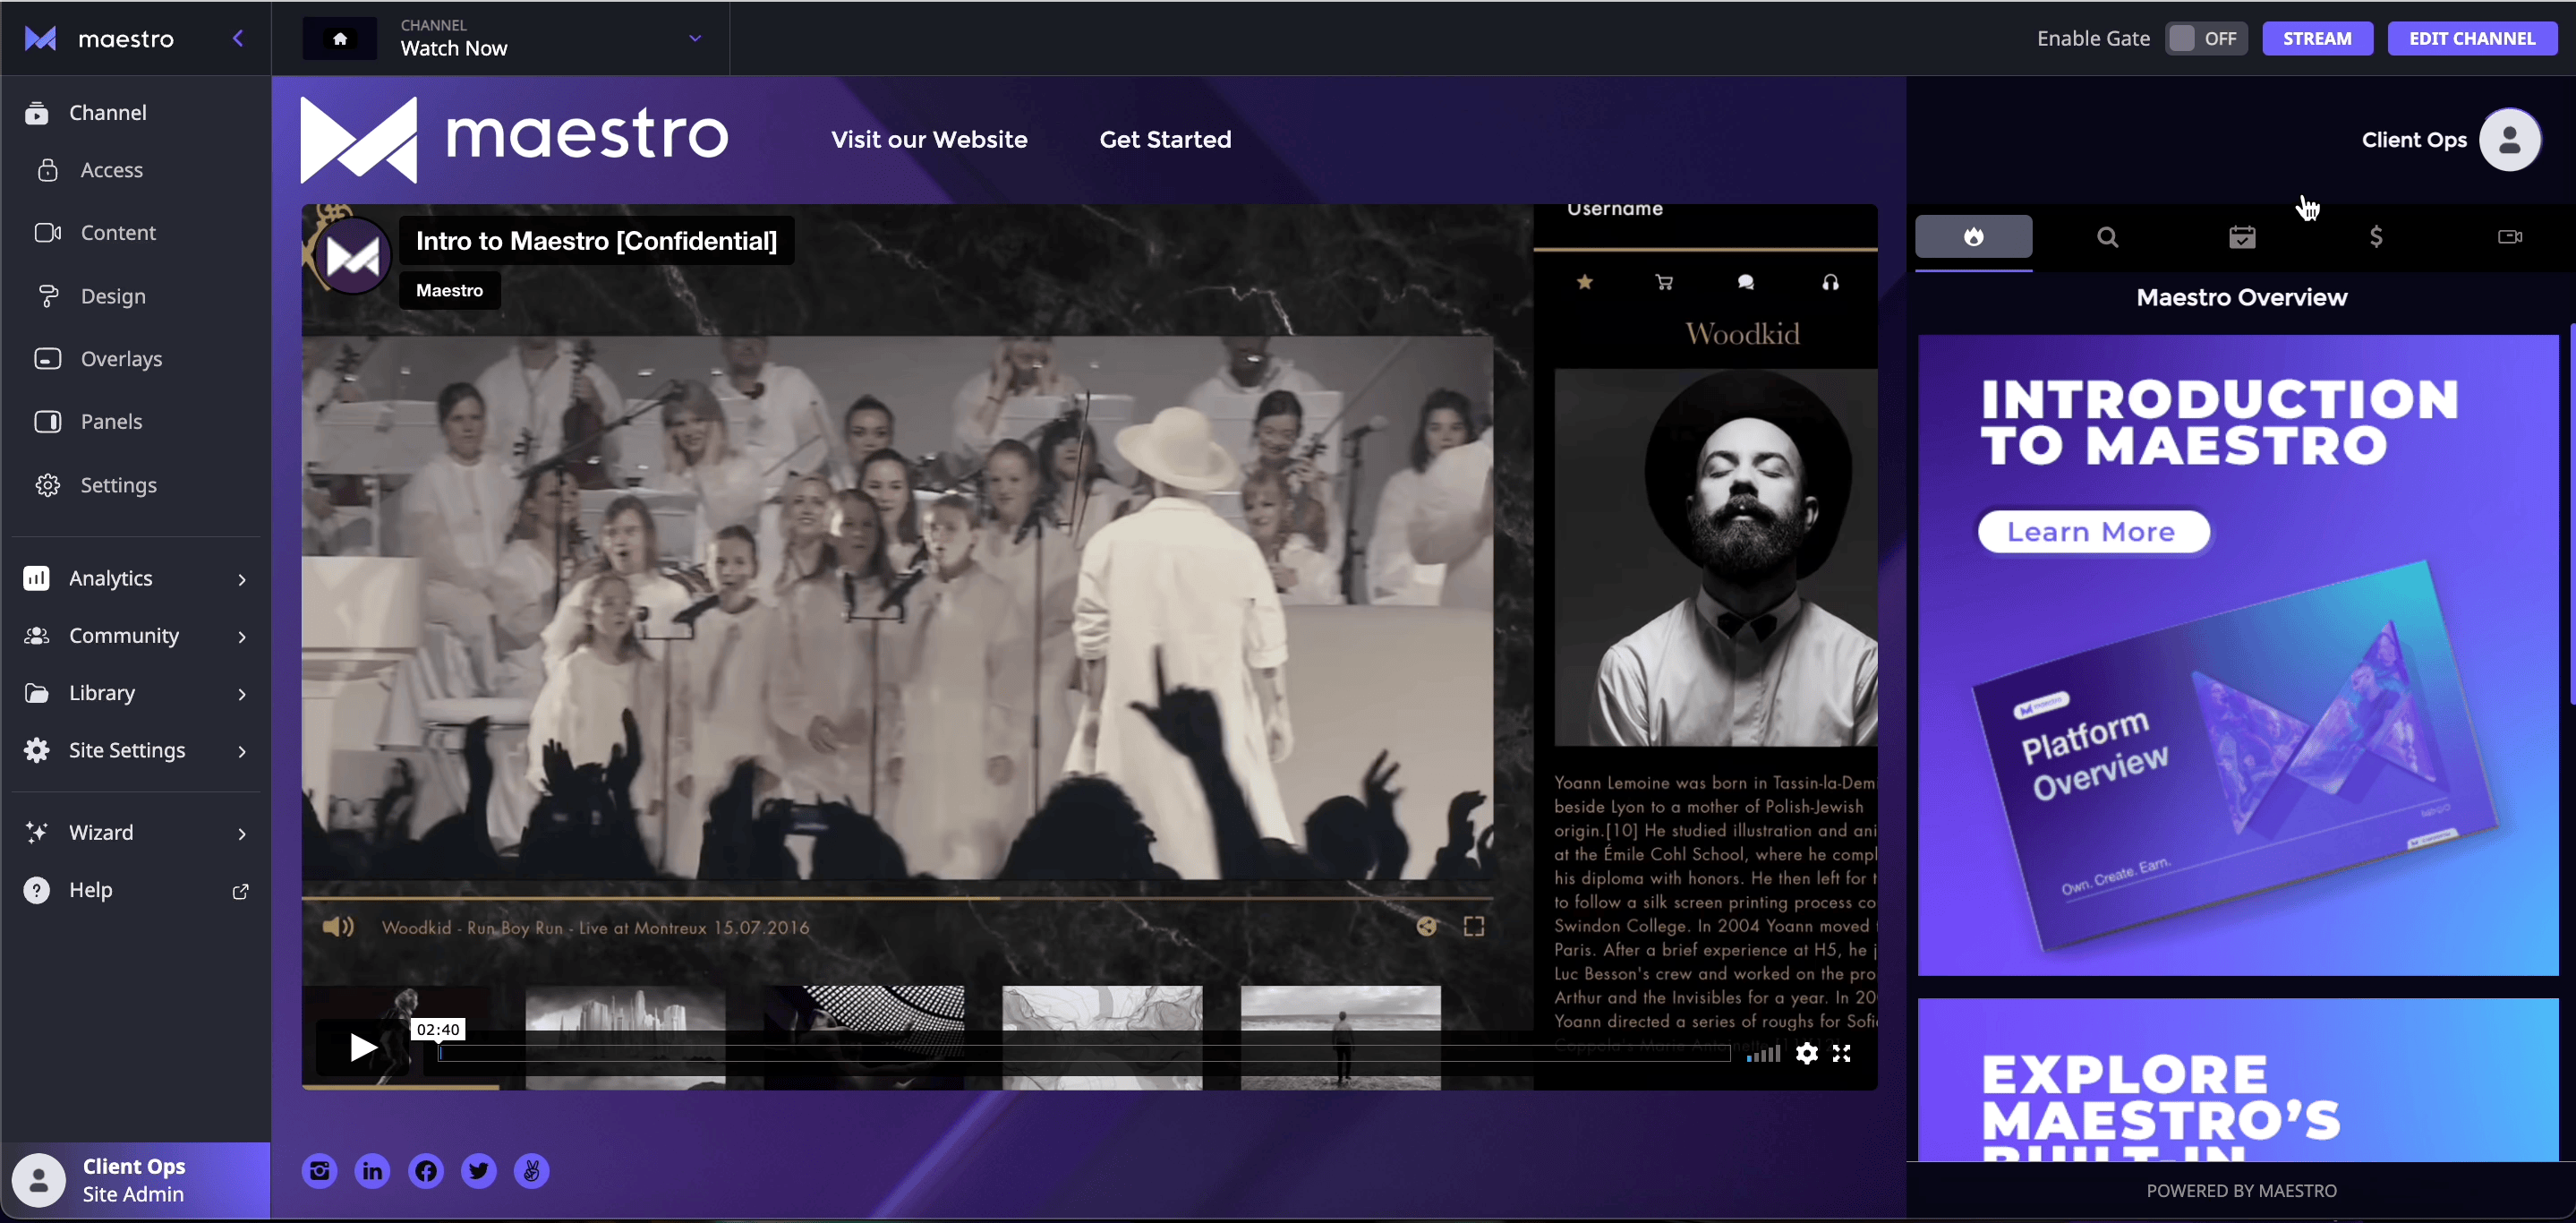
Clicking the “Edit Channel” button on the top right of your screen will open the Editor.
From the Editor, you can add a channel-specific logo, links in the header, a countdown clock, sponsor logos, links out to your social networks, and footer information.
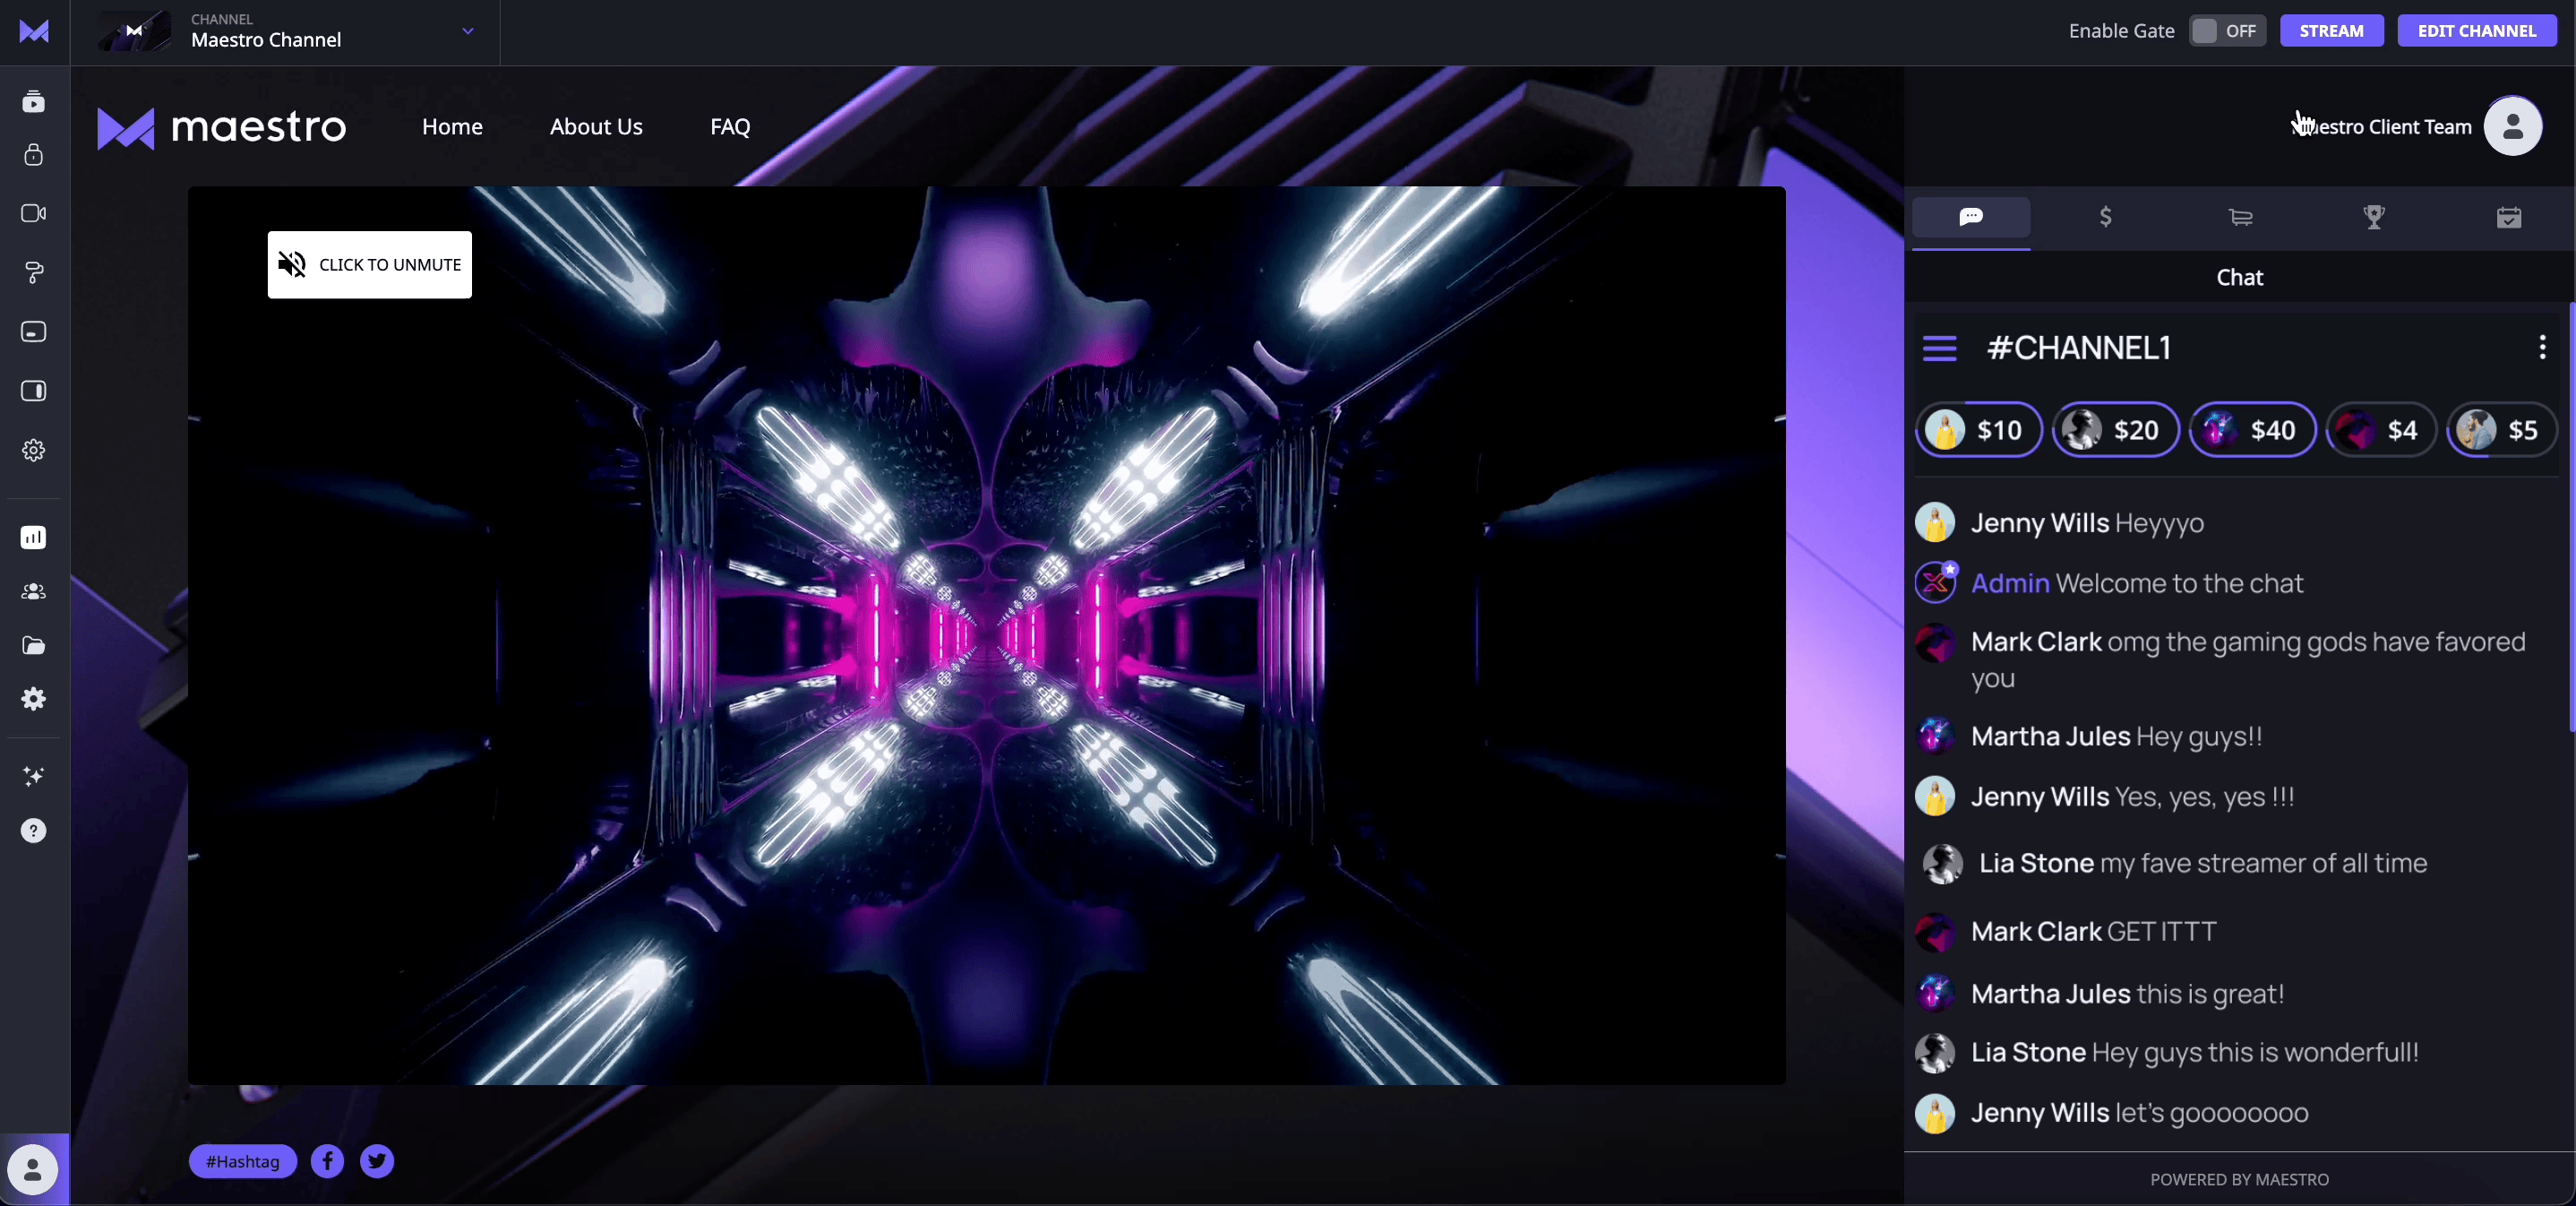
Sidebar: Panels
The right side of your screen has a sidebar that houses tools for user engagement called panels. panels are used to add interactivity and context alongside the stream.
Maestro includes a suite of panels in your catalog. To use a panel you’ve created, find it in your library and click the “Use” button (+) to activate it on your site.
Users can switch between the panels you’ve added as they watch. We recommend a maximum of 5 to be active at a time.
Video Content for Live Channels
Live Channels can house live streams or on-demand videos. To add content to your Live Channel, click the “Content” tab in your Admin bar.
Your Maestro Live Channel will play content based on a hierarchy: scheduled content > linked Twitch live stream > offline video. If there is any scheduled content, it will play and appear live and will override any Twitch live stream or offline video. If there is a Twitch live stream connected, it will override the offline video.
Learn more about managing content on Maestro.
Offline Videos or Images
When your Channel isn’t live, you can run an offline video or host an image, so people have something to watch even if you’re not online. This can be useful for showcasing a sizzle reel or an image with a CTA about your Maestro Site and the content you’ll house within it.
Additional Live Channel Settings
You can set up SEO, set your Live Channel Slug, and upload a navigation image all from Live Channel Settings.
Learn more about setting up a live channel.
5. Set Up Access Control
Maestro offers robust tools for gating access to your content so that you can make sure your videos are only accessible to your intended audience.
You can provide some content for free or put some content behind a paywall. You also can set up individual tickets or rolling subscriptions. You can lock sites behind a paywall or provide your audience with access codes. You can even offer tiered pricing.
Learn more about access control.
Next Steps
Congratulations! Once you’ve completed this checklist, your Maestro onboarding is complete. However, there are many more features to explore.
Here are a few next steps to explore as you become more familiar with Maestro.
- Analytics
- Community
Third-Party Apps: - Code Injection for Further Customization
Join our Discord server for more helpful tips and tricks. Be sure to introduce yourself in the #general channel. See you on the server!